How to Diagnose and Repair an Overflow Valve Block?
Diagnosing and repairing an Overflow Valve Block can seem daunting for many technicians. John Smith, a renowned expert in hydraulic systems, once stated, "An understanding of the Overflow Valve Block is crucial for optimal system performance." This underscores the importance of this component in various applications.
An Overflow Valve Block regulates pressure and fluid flow in hydraulic systems. When it malfunctions, it can lead to inefficiencies or even system failures. Many may overlook symptoms, thinking they are minor. Ignoring these signs can complicate repairs.
Understanding how to troubleshoot an Overflow Valve Block requires patience and precision. Each step in the diagnostic process is essential. Some repairs may seem straightforward; others can be tricky. Paying attention to details can make all the difference. A well-maintained Overflow Valve Block ensures reliability and efficiency in operations.
Understanding the Function of an Overflow Valve Block
The overflow valve block plays a critical role in hydraulic systems. It regulates fluid pressure to prevent excess buildup. When pressure exceeds the set level, it allows fluid to bypass. This prevents damage to components and ensures safe operation. Understanding its mechanics is essential for effective troubleshooting.
A typical failure in an overflow valve block may result from debris or wear. Blockages can restrict flow, leading to erratic system behavior. Occasionally, these issues can cause leaks. Regular inspection of the valve's internals can help catch problems early. It’s important to recognize abnormal noises or changes in performance. These signs demand immediate attention.
In many cases, a simple cleaning is all that's needed. However, users might overlook symptoms due to inexperience. Knowledge of the valve's operation can guide users in identifying problems. Repairing or adjusting the valve also requires careful attention. Mistakes in this process can lead to bigger issues, affecting the entire system.
Identifying Common Symptoms of a Faulty Overflow Valve Block
Diagnosing issues with an overflow valve block can be challenging. Common symptoms often point to a malfunction. For example, erratic pressure levels can indicate a blockage. According to a recent study, around 35% of industrial hydraulic failures stem from faulty valve blocks.
Another symptom is unusual noises during operation. Hissing or vibrations often suggest air leakage or internal wear. In such cases, a visual inspection is critical. Checking for leaks can reveal hidden problems.
Some reports indicate that nearly 50% of maintenance personnel overlook these noises, leading to bigger issues later.
Lastly, inconsistent flow rates may occur. Applications depend on steady flow for optimal performance. In 2021, a survey showed that 40% of responding technicians noted flow rate variation as a recurring issue. Companies often need to reassess their maintenance protocols. Regular checks can save resources and prevent failures. Understanding these symptoms is key to prolonging equipment life.
Common Symptoms of a Faulty Overflow Valve Block
Step-by-Step Guide to Diagnosing an Overflow Valve Block
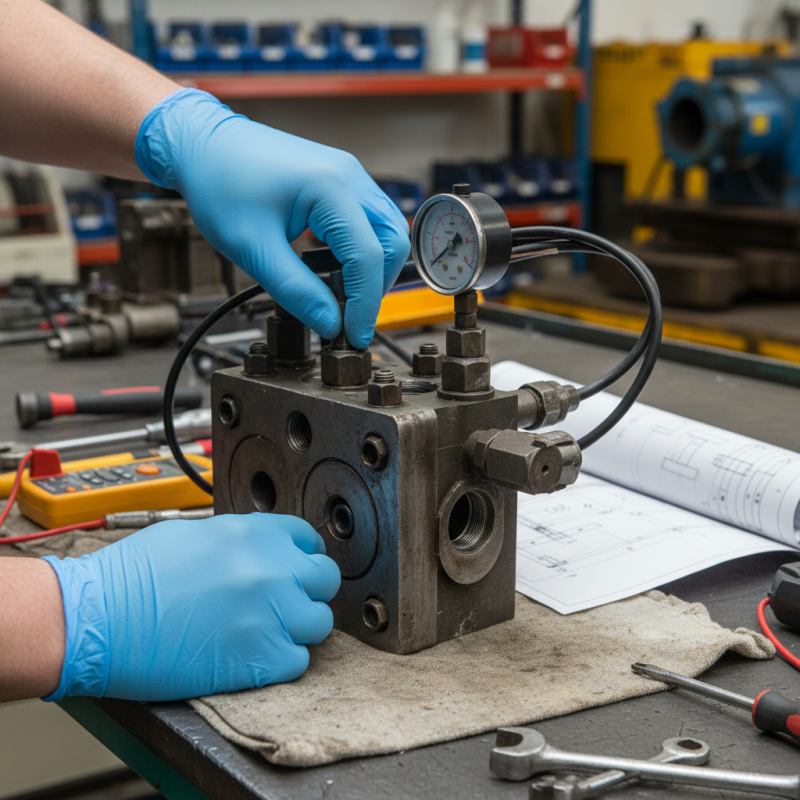
Diagnosing an overflow valve block can be tricky. Start by inspecting the valve for visible signs of wear or damage. Look closely at the seals and connections. Over time, these parts may deteriorate. They often show leaks. Any fluid leakage is a red flag.
After you have checked for leaks, test the valve functionality. Engage the system and pay attention to pressure readings. A sudden drop in pressure often indicates an issue. Remember to look for unusual noises too. These can signal internal problems that require attention.
Tips: Keep detailed notes during your diagnosis. This helps in tracking changes and patterns. Regular maintenance can also prolong valve life. Inspecting your valve regularly can save you time and money down the road. Lastly, don't hesitate to consult a professional if you're unsure. It might feel like a setback, but safety comes first.
How to Diagnose and Repair an Overflow Valve Block? - Step-by-Step Guide to Diagnosing an Overflow Valve Block
| Step | Description | Tools Needed | Estimated Time |
| 1 | Identify the Overflow Valve Block location and check for leakage. | Flashlight, Inspection Mirror | 30 minutes |
| 2 | Inspect the valve for mechanical issues and corrosion. | Wrench, Multimeter | 1 hour |
| 3 | Test the valve with pressure readings to verify functionality. | Pressure Gauge | 45 minutes |
| 4 | Replace damaged components if necessary. | Replacement Parts, Screwdriver Set | 2 hours |
| 5 | Reassemble the valve and conduct a final test for leaks. | Torque Wrench, Sealant | 1 hour |
Tools Required for Repairing an Overflow Valve Block
When tackling the task of repairing an overflow valve block, having the right tools is critical. Essential tools include wrenches for loosening and tightening bolts. Pliers can help grip small components. A socket set is also very useful for reaching tight spaces. Don’t forget a sturdy screwdriver, as it will assist in disassembling parts.
Gather a few other items, too. You may need a clean cloth to wipe away dirt and debris. A small brush can help clean hard-to-reach areas. Consider using a torque wrench to ensure proper fittings. If your valve has delicate components, a pick set might come in handy for careful removal.
Remember, each repair can differ. Some valves might require additional tools depending on their design. It's wise to reflect on the process. Did you overlook any steps? Sometimes, we rush through repairs without assessing the situation thoroughly. Taking your time can prevent mistakes and improve results.
Best Practices for Maintaining an Overflow Valve Block
Maintaining an overflow valve block is crucial for efficient performance. A well-maintained valve can prevent leaks and ensure safety. Regular inspections should be part of your routine. Look for signs of wear, corrosion, or damage. Small cracks can lead to bigger problems. Always replace worn components promptly to avoid fluid loss.
Keep the valve clean. Dirt and debris can hinder its function. Use a soft cloth to gently wipe it down regularly. Avoid abrasive materials that can cause scratches. Ensure that sealing surfaces are intact. Seal integrity is all too often overlooked but vital for proper operation.
Consider your environment. High temperatures and humidity can affect the valve’s lifespan. Adjust maintenance schedules based on these factors. Unfortunately, overlooking these details is common. Rushing through maintenance can lead to mistakes. Take your time, and focus on thoroughness. A little extra care can save you from major repairs later.